One day, protecting your anonymity in Minecraft might be your top priority. Griefers are the last thing you need, since they will take advantage of your home and make life unpleasant for wherever you decide to store your things or establish your base.
To make finding such a strategic spot more challenging, a hidden door could be the answer. This article will detail the steps required to construct your very own hidden door, as well as the materials you’ll need to get started. Here you will get to know how to make a secret door in Minecraft.
How to Make a Secret Door in Minecraft
This Instructable will show you how to construct a door that, when closed, takes up almost little space at all. Whether playing with siblings or on a server with friends, having the ability to construct one of these is invaluable; no one else can see your hideout, and only you know the secret entrance.
Step 1: Add Pistons
Gather four sticky pistons and form a square. If they aren’t sticky, the door will open once and stay open forever. Then, at a 90-degree angle, insert a 1×2 column of adhesive pistons into the 2×2 square. The doors will open or close in the direction that these pistons are pointing.
Step 2: Add Your Door Blocks
The area between the two groups of sticky pistons is where you should put the material that will serve as your door. As long as it slides easily (no obsidian or bedrock, please! ), it will do (so no slime blocks).
In order to make the door stand out, I’ve used blocks of a different hue than the rest of the wall. (Although a rainbow is a great option for a door you want to be obvious.) Sand or gravel is not a good option because it won’t mix in with the rest of the environment. I’ll elaborate in a while.
Step 3: Wash. Rinse. Repeat
To make a mirror image that is two blocks apart, repeat steps 1 and 2. Don’t construct anything in the two empty space blocks where the pistons will protrude.
Step 4: Build a Wall
Conceal the pistons behind a wall. We recommend at least 6 blocks in length and 4 blocks in height. Keep a blank 22 space in the middle for the entrance.
Step 5: Wire It Up
Using the first image as a guide, create a little loop. We’ll be putting our redstone here. Then, as seen in the second image, attach two repeaters such that their output is directed outside.
To make the door work, you’ll need to set these to the second delay level, which is one click. After that, fill in the remaining space between the repeaters with redstone dust. Check all of your connections and the orientation of your repeaters.
Step 6: Choose a Location for Your Secret Hideout
Discover your Minecraft world and settle down wherever you feel most at home. You can basically set up shop somewhere that isn’t composed entirely of sand or gravel and is accessible.
It was atop a little hill with a cave that I decided to set up camp. It’s too clear to say the cave, since many people would choose it. Your Hideout is considerably more disguised higher up the slope.
Step 7: Dig It Out
Assuming you’ve settled on a spot, the next step is to make room for your entrance. You can begin by boring a hole three blocks deep into the mountain, which will be 2 squares wide and 2 squares deep.
Even though you could go further, this is the simplest option (and minimum). After that, create two 2x2x2 cavities in the cave’s walls. Place your sticky pistons here, and don’t scrimp.
Step 8: Add the Redstone
In the first illustration of this procedure, two repeaters are added to the schematic in the positions shown. (at the former excavation site where redstone was removed). Set these to delay level 2 (one click) if you want the door to open and close.
Step 9: Add the Pistons
You should begin by constructing two squares of sticky pistons in each of your cave’s walls. If you’re still perplexed, I recommend looking at the accompanying images and notes.
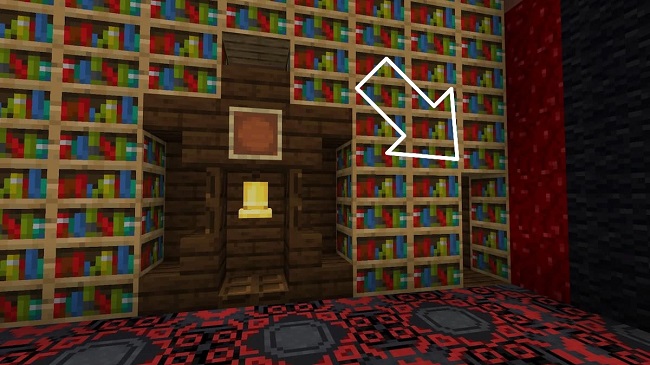
Step 10: Add a Redstone Torch
Redstone torches are should be placed on one of the two blocks below the pistons. It makes no difference which one, provided that you identify it correctly.
Step 11: Add the Door and Patch the Holes
You should have been pushed outside when you put down the torch, but if you weren’t, you’ll need to dig your way out and fill in the hole you made. After you are outside, you may install your chosen door material into the pistons and begin searching for entrances to your cave. You should use a similar material to fill in any gaps you detect.
Step 12: Finishing Up
As a reminder, attach a lever to the block where the redstone torch was previously placed. Just by pulling the lever, the door should open. If the door still won’t open, try a different combination of blocks. A home is the next thing you should provide for yourself.
Conclusion
The term “secret door” refers to a hidden entry into a room or area that the player has constructed. They can be used for many purposes, from securing assets on a multiplayer server to creating an adventure map to playing around with. There are a few types of secret doors that can only be accessed with a redstone opening mechanism, such as piston doors.
Several kind of secret entrances will be introduced and their fundamentals discussed. Don’t be surprised if someone recognizes it immediately; some of the doors on the list are quite common. Hope now you know how to make a secret door in Minecraft.


